3. MobileNet_SSD
3.1. 功能介绍
MobileNet_SSD目标检测算法示例使用图片作为输入,利用BPU进行算法推理,发布包含目标类别和检测框的算法msg。
Mobilenet_SSD是从 https://github.com/chuanqi305/MobileNet-SSD 获得的 caffe 模型,使用VOC数据集进行训练,支持的目标检测类型包括人、动物、水果、交通工具等共20种类型。
代码仓库:https://c-gitlab.horizon.ai/HHP/box/hobot_dnn
应用场景:MobileNet_SSD是以MobileNet为基础的目标检测算法,具有速度快,易于部署的优点,可实现物体检测、垃圾识别等功能,主要应用于自动驾驶、智能家居等领域。
人脸检测案例:https://github.com/bruceyang2012/Face-detection-with-mobilenet-ssd
车牌检测案例:https://github.com/soonhahwang/Mobilenet-SSD-to-detect-Licence-Plate
3.2. 支持平台
| 平台 | 运行方式 | 示例功能 |
|---|---|---|
| 旭日X3派 | Ubuntu 20.04 | · 启动MIPI/USB摄像头,并通过web展示推理渲染结果 · 使用本地回灌,渲染结果保存在本地 |
| X86 | Ubuntu 20.04 | · 使用本地回灌,渲染结果保存在本地 |
3.3. 准备工作
旭日X3派
旭日X3派已烧录好地平线提供的Ubuntu 20.04系统镜像。
旭日X3派已成功安装TogetheROS.Bot。
旭日X3派已安装MIPI或者USB摄像头,无摄像头的情况下通过回灌本地JPEG/PNG格式图片或者MP4、H.264和H.265的视频方式体验算法效果。
确认PC机能够通过网络访问旭日X3派。
X86平台
X86环境已配置好Ubuntu 20.04系统镜像。
X86环境系统已成功安装tros.b。
3.4. 使用介绍
旭日X3派
使用MIPI摄像头发布图片
MobileNet_SSD目标检测算法示例订阅sensor package发布的图片,经过推理后发布算法msg,通过websocket package实现在PC端浏览器上渲染显示发布的图片和对应的算法结果。
# 配置tros.b环境
source /opt/tros/setup.bash

# 配置MIPI摄像头
export CAM_TYPE=mipi

# 启动launch文件
ros2 launch dnn_node_example hobot_dnn_node_example.launch.py config_file:=config/mobilenet_ssd_workconfig.json image_width:=480 image_height:=272
使用USB摄像头发布图片
# 配置tros.b环境
source /opt/tros/setup.bash

# 配置USB摄像头
export CAM_TYPE=usb

# 启动launch文件
ros2 launch dnn_node_example hobot_dnn_node_example.launch.py config_file:=config/mobilenet_ssd_workconfig.json image_width:=480 image_height:=272
使用本地图片回灌
MobileNet_SSD目标检测算法示例使用本地JPEG/PNG格式图片回灌,经过推理后将算法结果渲染后的图片存储在本地的运行路径下。
# 配置tros.b环境
source /opt/tros/setup.bash

# 启动launch文件
ros2 launch dnn_node_example hobot_dnn_node_example_feedback.launch.py config_file:=config/mobilenet_ssd_workconfig.json image:=config/target.jpg
X86平台
使用本地图片回灌
MobileNet_SSD目标检测算法示例使用本地JPEG/PNG格式图片回灌,经过算法推理后将算法结果渲染后的图片存储在本地的运行路径下。
# 配置tros.b环境
source /opt/tros/setup.bash

# 启动launch文件
ros2 launch dnn_node_example hobot_dnn_node_example_feedback.launch.py config_file:=config/mobilenet_ssd_workconfig.json image:=config/target.jpg
3.5. 结果分析
使用摄像头发布图片
在运行终端输出如下信息:
[example-3] [WARN] [1655095279.473675326] [example]: Create ai msg publisher with topic_name: hobot_dnn_detection
[example-3] [WARN] [1655095279.473789113] [example]: Create img hbmem_subscription with topic_name: /hbmem_img
[example-3] [WARN] [1655095280.697388819] [img_sub]: Sub img fps 31.16
[example-3] [WARN] [1655095280.710505278] [example]: Smart fps 31.50
[example-3] [WARN] [1655095281.697831409] [img_sub]: Sub img fps 30.00
[example-3] [WARN] [1655095281.743811574] [example]: Smart fps 30.01
[example-3] [WARN] [1655095282.730768103] [img_sub]: Sub img fps 30.04
[example-3] [WARN] [1655095282.744084511] [example]: Smart fps 30.00
输出log显示,发布算法推理结果的topic为hobot_dnn_detection,订阅图片的topic为/hbmem_img,订阅到的图片和算法推理输出帧率约为30fps。
在PC端的浏览器输入http://IP:8000 即可查看图像和算法渲染效果(IP为旭日X3派的IP地址):
使用本地图片回灌
在运行终端输出如下信息:
[example-1] [INFO] [1654930510.201326806] [example]: Output from image_name: config/target.jpg, frame_id: feedback, stamp: 0.0
[example-1] [INFO] [1654930510.201485092] [PostProcessBase]: outputs size: 12
[example-1] [INFO] [1654930510.201581047] [PostProcessBase]: out box size: 2
[example-1] [INFO] [1654930510.201672794] [PostProcessBase]: det rect: 227.27 101.873 299.219 223.667, det type: pottedplant, score:0.995207
[example-1] [INFO] [1654930510.201778415] [PostProcessBase]: det rect: 62.3792 155.731 221.676 223.179, det type: sofa, score:0.982129
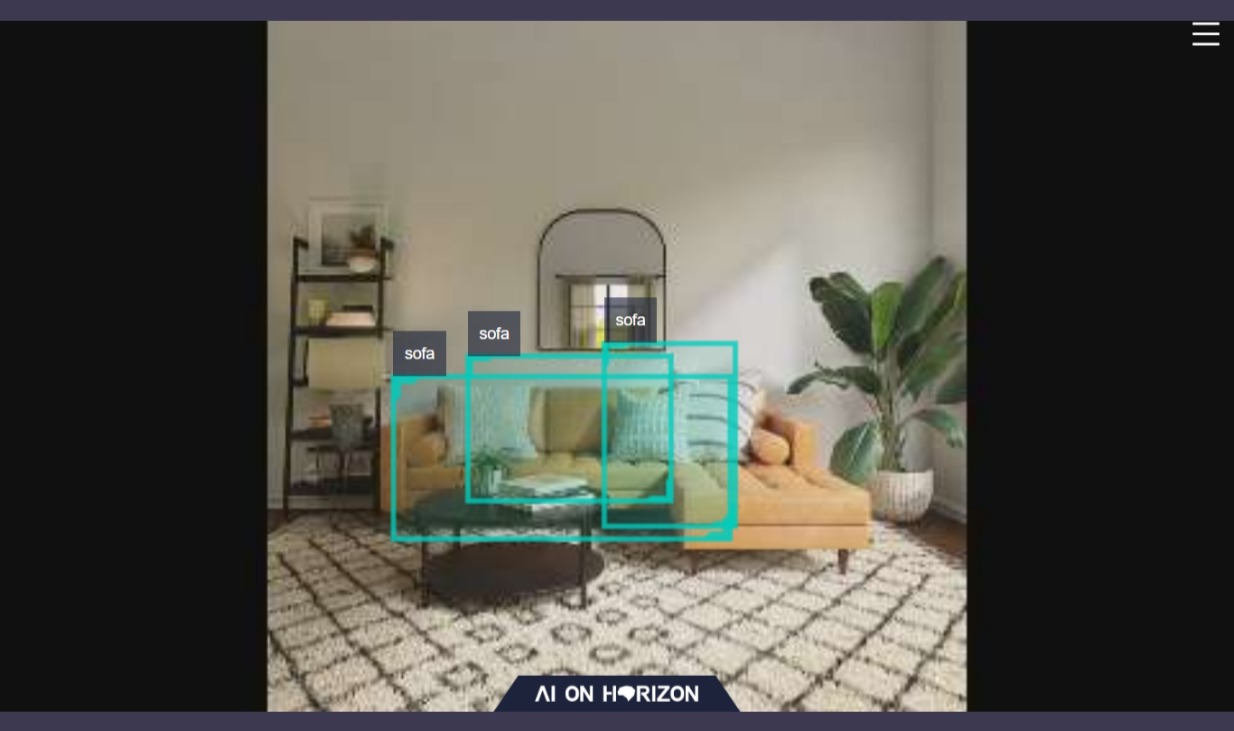
输出log显示,算法使用输入的图片推理出2个目标,并输出了目标检测框坐标(输出的坐标顺序分别是人体框的左上的x和y坐标,和右下的x和y坐标)和类别。存储的渲染图片文件名为render_feedback_0_0.jpeg,渲染图片效果:
